» WordPress

Upgrading WordPress via Shell Access

halo_wordpressWordPress 2.7 is out along with its brand new dashboard look, a new commenting system that supports pagination and threading, and some fixes to the crucial security issues.

I used to download the ZIP file from WordPress.org, extract that file in my machine, then upload the whole contents through FTP. Even if you’re using DSL/broadband internet connection, this uploading process, which is about 5MB size, is apparently rather time-wasting. Upgrading one blog is all fine, you can do it while you’re checking your Facebook without even realizing that it’s done already. But how about upgrading 9 WordPress blogs? And not to mention the unreliable internet connection in Indonesia which leads to errors in the uploading process.

The solution is to upgrade WordPress from UNIX shell prompt. It won’t take more than 30 seconds of your valuable time. Please mind that this procedure is only intended for them who are familiar with UNIX/Linux interface and the shell commands. If you are totally new to these stuffs, please follow the FTP-way of upgrading WordPress.

Step 1: Backup existing database!

1
2
3
$ mkdir /backup/yourblogname
$ mysqldump -u user -p WP-DATABASENAME > /backup/yourblogname/blog.db.sql
$ tar -zcvf /backup/yourblogname.tar.gz /public_html/yourblogname

Step 2: Download the latest version of WordPress

1
2
3
$ cd /tmp
$ wget http://wordpress.org/latest.zip
$ unzip latest.zip

Step 3: Overwrite all new files

1
2
3
$ cd /public_html/yourblogname
$ cp -avr /tmp/wordpress/* .
$ rm -rf /tmp/wordpress /tmp/latest.zip

Step 4: Database upgrade

Open a browser and go to http://yourblogname.com/wp-admin/upgrade.php

You’re done and you can repeat this procedure to all WP blogs you have on your server.

PS. You need to replace path names and database name with actual values.
PPS. If something goes crazy, you can restore your old database and files from /backup/wp/yourblogname directory.
PPPS. Yes, 9 WordPress blogs. You obviously need to feel the joy of hosting blogs and websites on an unlimited bandwidth/quota web hosting company.

Full Story » Comments (22)

Platformate Theme at ColorLabs

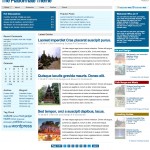
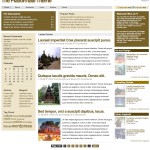
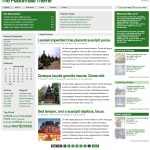
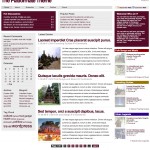
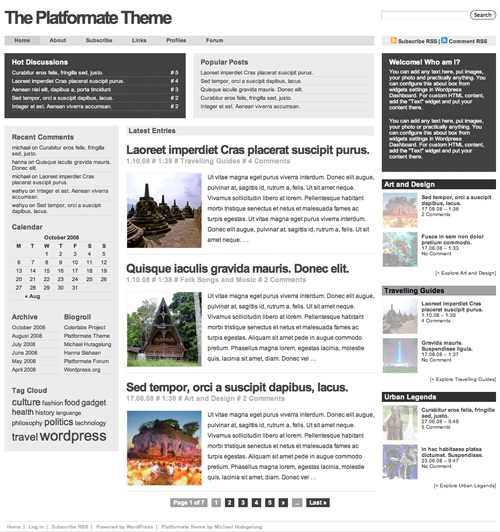
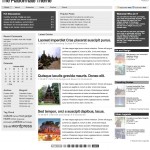
Platformate is a magazine-style theme that keeps your blog personal. Have you ever wished to have a unique, one-of-a-kind design for a personal WordPress blog? A touch of magazine block elements showing popular posts in the front page while having other posts remain as usual blog date-ordered lists? Along with automatically generated fancy thumbnails that are displayed at a pretty sidebar to show your latest posts? There is Platformate for you, your blog’s total makeover.

Platformate Theme is available at ColorLabs. See the demo here.

Platformate: Mysterious Black

Copyright Notice

  1. TimThumb is an open source automatic image resizing script developed by Tim McDaniels and is distributed under the MIT License.
  2. Feedburner “Feedsmith” plugin was originally developed by Steve Smith and is now available for download to all Feedburner.com users
  3. Google Analytics is a web tracking and statistics tool from Google.com. Tracking codes are available to all Google Analytics user and can be downloaded from Google.
  4. All sample images are courtesy of its respective authors. Details about sample images can be read here.
  5. WordPress template files and CSS stylesheets are originally developed by Michael Jubel Hutagalung.

Thank you.

Purchase nowLive demo

Full Story » Comments (13)

Arthemia Premium and WordPress Localization

So, what about localization? “Although WordPress displays in U.S. English by default, the software has the built-in capability to be used in any language. The WordPress community has already translated WordPress into many languages, and there are Themes, translation files, and support available in many other languages.” - WordPress.org

WordPress in Your Language

To get WordPress in your own language, read this post from WordPress.org thoroughly and download any available localized WordPress that you want. There are 58 languages available for you. After that, simply upload all the files and you will find everything in the WordPress Dashboard panel is now in your own language.

If you still see English texts in your WordPress Dashboard, do a double-check and analysis. Open your wp-config.php file in a text editor and search for:

define ('WPLANG', 'xx_YY');.

xx_YY is your language code, for example: de_DE for German, id_ID for Bahasa Indonesia, or fr_FR for French. If you did not find that command there, you probably downloaded the wrong file.

If you did and you don’t want spend your valuable time re-uploading the whole package, read this post regarding manually installation of wordpress language files. For me, uploading a total of 4MB files is somewhat time-consuming. Why? Because there are only 3 files that needed to do the whole translation. (Shouldn’t I tell you this in the first place?) :) Read that post and search for .PO and .MO file for your local language and do manual installation.

Arthemia Premium in Your Language

OK, you got WordPress in you own language, what should you do now? Well, here’s what you need.

  1. Arthemia Premium theme (of course). You can purchase the theme here.
  2. A .PO and .MO editor, you can try POEdit. You can download POEdit here.

And here is the step-by-step procedure on how to translate Arthemia Premium without editing the template files.

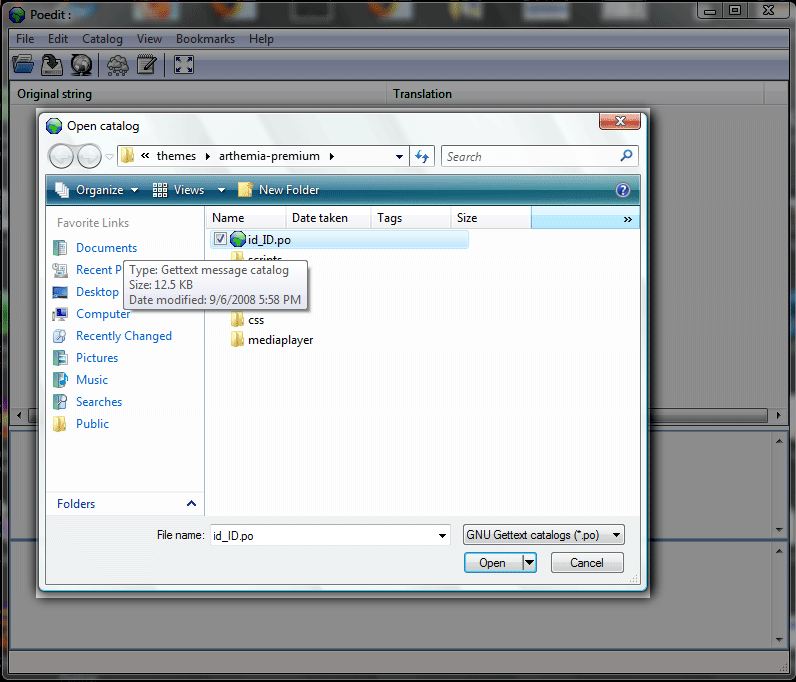
    1. Install and run POEdit. Go to the menu File >> Open and select the file id_ID.po, which is included in the purchase package. id_ID.po is a language file for Indonesian version of Arthemia Premium. This tutorial will enable you translate that language file to another language.

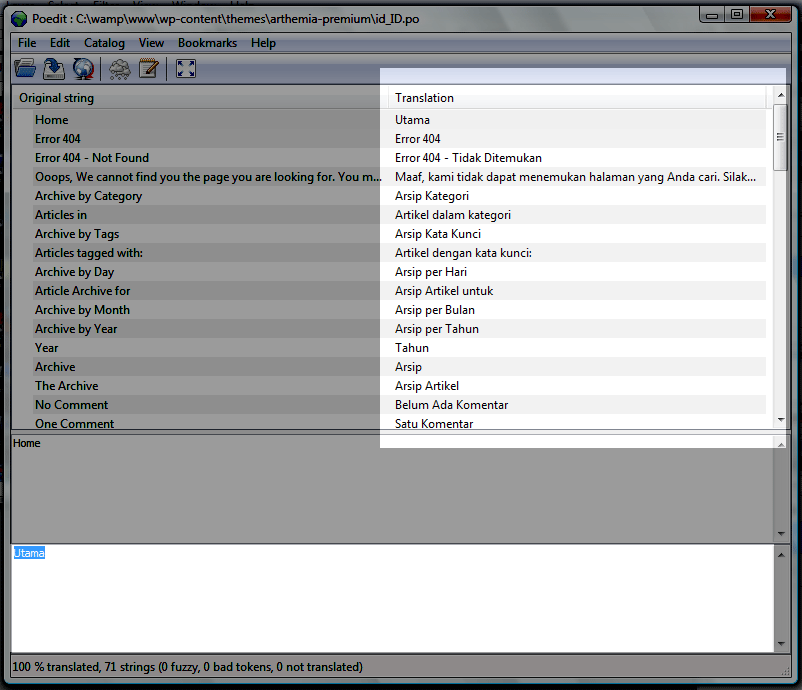
    1. After that, your POEdit would look similar to this picture below. On the left is the original strings, which are in English, and on the right is the translated string, in this case is still in Bahasa Indonesia.

    1. Edit every string and translate it into your own language. Simply type a new word in the edit box that is located at the bottom section. Beware of symbols (%), HTML tags (<p>, </p>, etc), and punctuations (dot, comma, semi-colons). Do not erase any of those.
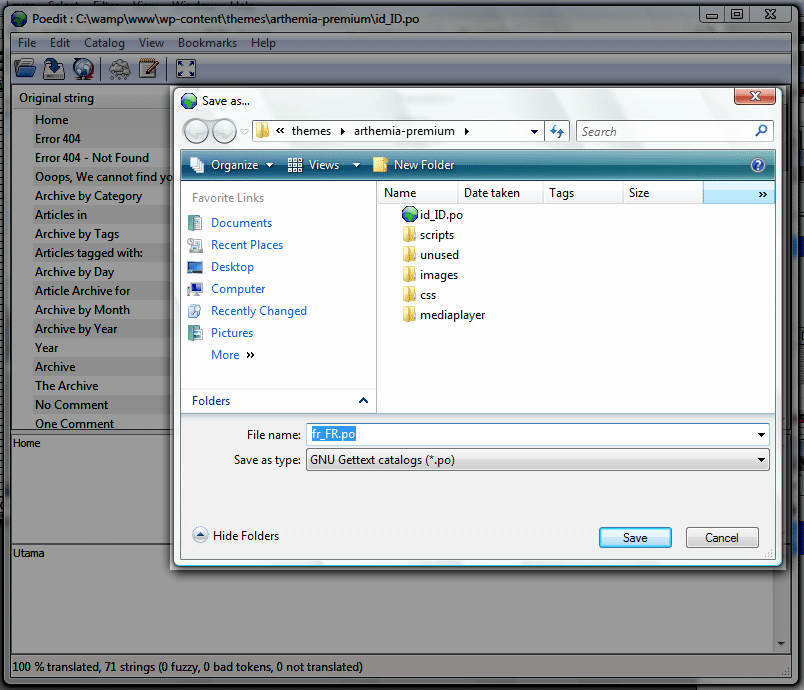
    2. When you’re done, save the file as a new language file. Eg. fr_FR.po for French. A complete list of naming convention can be read here.

  1. Upload the file and put it in this folder: /wp-content/themes/arthemia-premium/
  2. Refresh your Arthemia-Premium-powered blog and notice the difference. If you feel like something is grammatically incorrect, repeat the step above and re-upload the language file. Some pages you need to check are the front page, the PAGE page, the post page, the archive page, the search result page, and the author page.
  3. You’re done.

Note: Texts in the sidebar and footer section of the theme are controlled from sidebar widgets. Go to Dashboard >> Design >> Widgets and edit those texts.

What languages are already available?

These are some language files that are already available for download. This list is updated and is waiting for you voluntary work to add a new language become available. (UPDATE: This post has been moved to http://colorlabsproject.com/knowledgebase-tutorials/arthemia-premium-and-wordpress-localization/).

Well, WordPress and Arthemia Premium are now in your own language. Terima kasih. Thank you. Merci beaucoup. Muchas gracias. Danke. Dankie. Dêkuji. Sas efharisto. Arigato gozaimasu.

Purchase nowLive Demo

Full Story » Comments (21)

Tutorial: TimThumb Thumbnail Generation with Arthemia

If you still have problems getting the thumbnail automatic generation working, please read this tutorial. I spent a lot of my time creating this tutorial, including screen shots for some significant steps, and adding narrative text to each image. Please consider reading the whole instruction again, again, and again because I found out that there is 90% possibility that you missed one spot and there are many occurrences one say that he/she did not missed anything but ended up saying “Ah, yeah, I forgot that one.” :D

The CHMOD 777

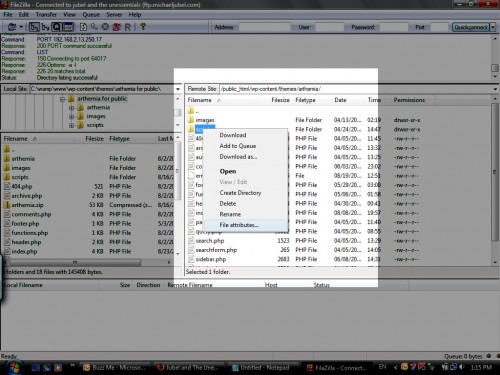
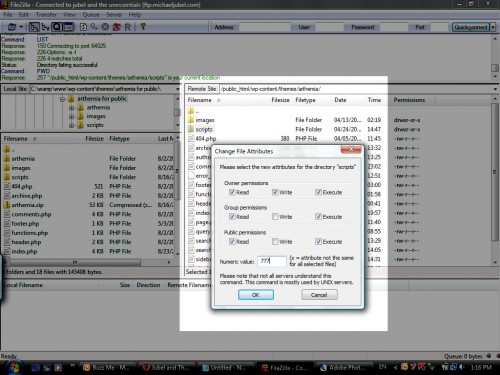
Upload and activate the Arthemia theme. Then, the first step is to make the scripts and cache folder writable. You can either try ‘777’ writable or ‘755’ writable. Some web hosting company prevent you making any folder ‘777’ writable due to some security reasons. But, I suggest you to try with ‘777’ writable first. I use FileZilla to do the FTP work because it is free and has a lot of features. To make the folders writable, simply right click the folder name and select ‘File Attributes’ and a dialog box will show up.

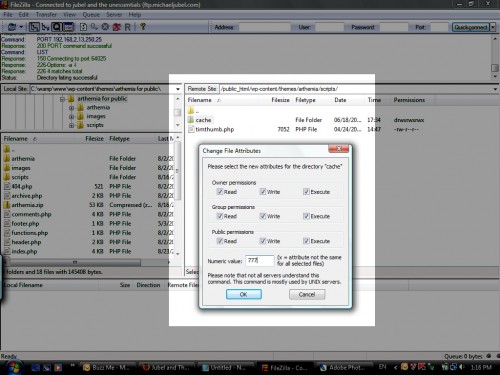
You can tick all the attributes there, consider it a finger exercise, or directly type 777 as the folder attribute. Do this to both scripts and cache folder.

You’re done with FTP work and may continue to the image uploading procedure.

Uploading an image

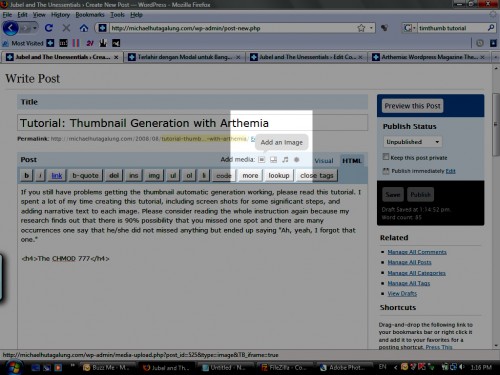
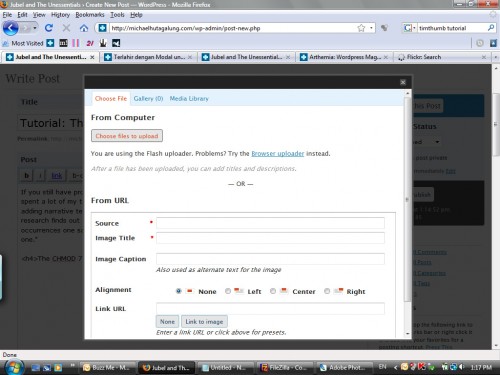
To upload image, you can use the built-in Add Image WP feature. In the post editing page, notice the Add media icons just below your post title and permalink. Click “Add Image” and an image uploading page will show up.

Upload any image that you like, preferably the properly sized one (for example: 300×300 pixel or bigger for Arthemia theme).

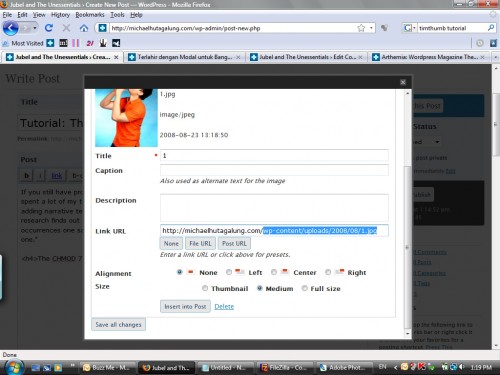
After the image is uploaded, you can see the image location from the ‘Link URL’ field. In this tutorial, it is: http://michaelhutagalung.com/wp-content/uploads/2008/08/1.jpg. Values may vary depending on your blog settings. One may have the time-structured folder while others may not. Copy that value but remember to get rid of your blog home page location. In my case, the final value will be wp-content/uploads/2008/08/1.jpg.

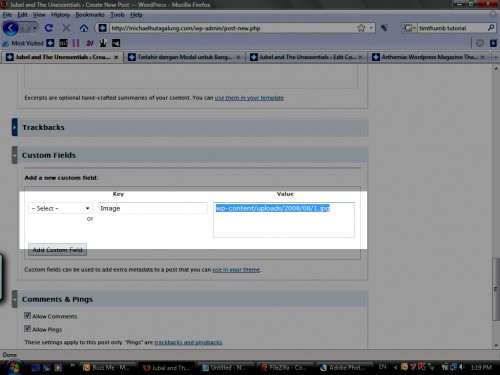
Then, close the image uploading page and you do not need to clik ‘Insert to Post’ button if you do not want to. When you’re back in the post editing page, scroll down until you find “Custom Fields”. Make a new Custom Field with “Image” as the key and the image location as the “Value”.

You’re done. Please note that there is no support provided for Arthemia Free. Support is only provided for Arthemia Premium. If you have any problem with Arthemia Premium, please submit a support ticket to http://colorlabsproject.com/support.

Whether you want to pass CCNA voice or interested in CCNA wireless, our CCNA security training contains everything you need for exam prep.

Full Story » Comments (87)

Arthemia Premium at ColorLabs

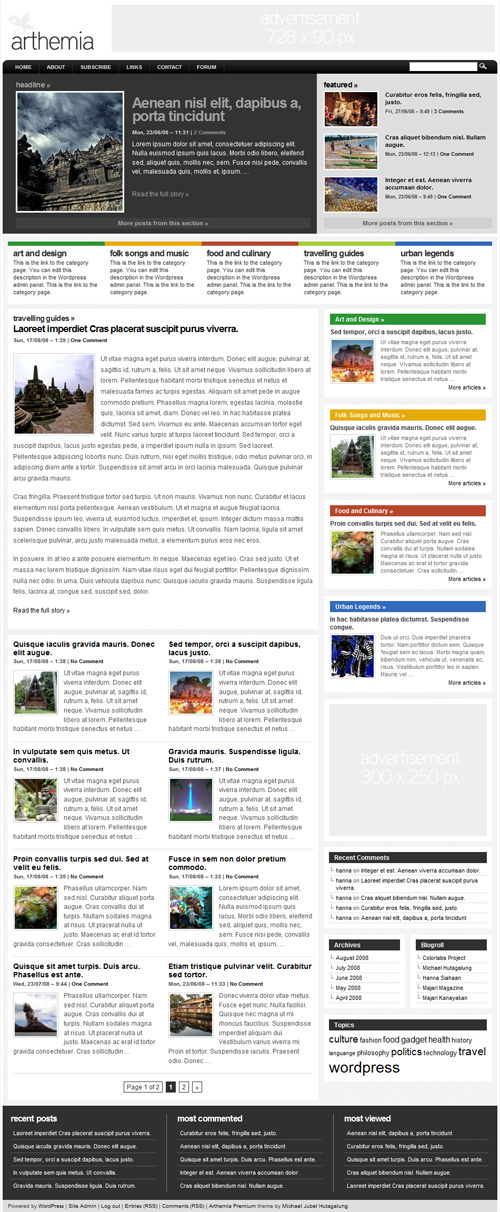
Arthemia Premium is magazine style theme for WordPress. Arthemia is unleashing the power of WordPress to become a simple-yet-powerful CMS (content management system) with the automatic thumbnail generation feature and theme administration panel. A fresh and awesome blend of a blog and a magazine, for you. Arthema Premium is available at ColorLabs. See the demo here.

Copyright Notice

  1. TimThumb is an open source automatic image resizing script developed by Tim McDaniels and is distributed under the MIT License.
  2. Feedburner “Feedsmith” plugin was originally developed by Steve Smith and is now available for download to all Feedburner.com users
  3. Google Analytics is a web tracking and statistics tool from Google.com. Tracking codes are available to all Google Analytics user and can be downloaded from Google.
  4. All sample images are courtesy of its respective authors. Details about sample images can be read here.
  5. WordPress template files and CSS stylesheets are originally developed by Michael Jubel Hutagalung.

Thank you.

Purchase nowLive Demo

Full Story » Comments (35)